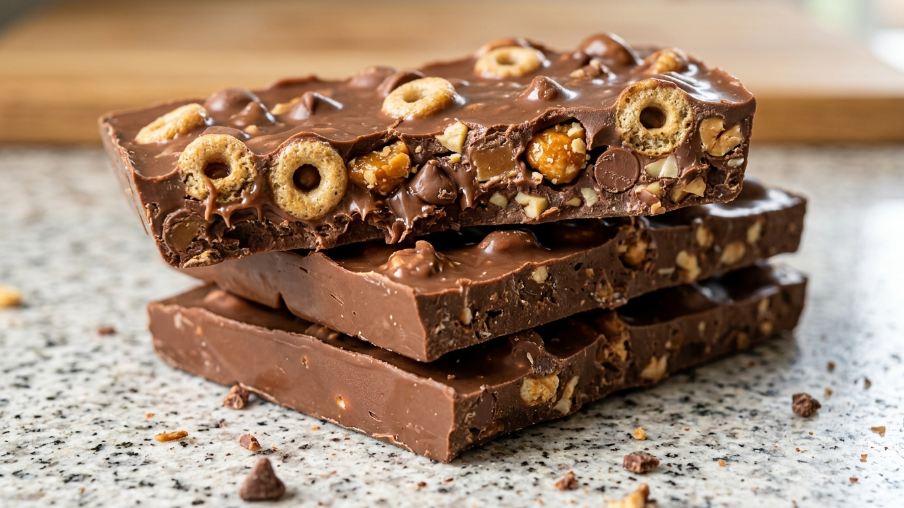
No-Bake Chocolate Crunch Bars (Easy & Quick)
Chocolate Crunch Bars are the ultimate sweet treat for anyone who loves the combination of rich, velvety chocolate and a satisfying, crispy texture. These no-bake desserts are wonderfully simple to prepare, making them a fantastic option for when you need a quick snack or a impressive dessert for a gathering. With a blend of crispy rice cereal, wholesome oats, and your choice of nuts, all bound together with a luscious chocolate and peanut butter mixture, these bars are a guaranteed hit with both children and adults. Their versatility and ease of preparation ensure they will become a firm favourite in your recipe collection.
Ingredients
Dry Ingredients
- 2 cups crispy rice cereal (choose a good quality brand for the best crunch)
- 1 cup rolled oats (old-fashioned oats are ideal for texture, though quick oats also work)
- 1 cup chopped nuts (such as almonds, peanuts, or walnuts; toasting them beforehand adds extra flavour)
Wet Ingredients
- 1 cup chocolate chips (milk or dark; dark chocolate with a higher cocoa content gives a richer taste)
- ½ cup creamy peanut butter (smooth peanut butter ensures even mixing; natural peanut butter is a good alternative)
- ¼ cup honey or maple syrup (honey gives a caramel-like flavour, while maple syrup offers an earthy sweetness)
Optional Toppings
- ¼ cup shredded coconut (toasted coconut adds extra crunch and flavour)
- Extra chocolate chips for drizzling (melted white or dark chocolate creates an elegant finish)
Note: For a gluten-free version, use gluten-free rice cereal. To make these bars nut-free, simply substitute the peanut butter with sunflower seed butter and the chopped nuts with seeds such as sunflower or pumpkin seeds.
Step-by-Step Instructions
- Prepare the pan: Line an 8×8 inch square baking pan with parchment paper, leaving some overhang on two sides to help you lift the bars out easily later. Press the paper firmly into the corners to ensure a snug fit.
- Melt the chocolate mixture: In a medium saucepan over a very low heat, combine the chocolate chips, peanut butter, and honey (or maple syrup). Stir constantly until the mixture is completely melted, smooth, and glossy—this should take about 3–5 minutes. Remove from the heat immediately to prevent the chocolate from burning.
- Mix the dry ingredients: In a large mixing bowl, combine the crispy rice cereal, rolled oats, and chopped nuts. Stir well to ensure the nuts and oats are evenly distributed throughout the cereal.
- Combine wet and dry: Pour the melted chocolate mixture over the dry ingredients. Using a spatula, stir thoroughly until every piece of cereal and oat is evenly coated and no dry patches remain. Be sure to scrape the bottom and sides of the bowl to incorporate all the mixture.
- Press into the pan: Transfer the mixture into the prepared baking pan. Use a spatula or the back of a spoon to press the mixture down very firmly and evenly into the pan, creating a compact and level surface. This step is crucial to ensure the bars hold together well once set.
- Add toppings (optional): If using, sprinkle the shredded coconut over the top and gently press it in. For an extra touch, melt a small handful of additional chocolate chips and drizzle it over the surface in a decorative pattern.
- Chill until set: Place the pan in the refrigerator for at least 1–2 hours, or until the bars are completely firm. If you are short on time, you can speed up the process by placing them in the freezer for about 30 minutes.
- Slice and serve: Once fully set, lift the bars out of the pan using the parchment paper overhang. Place them on a cutting board and use a sharp knife to cut them into squares or rectangles. Enjoy!
Tips and Tricks for Perfect Bars
- Melt with care: Keep the heat low when melting the chocolate mixture and stir constantly. Chocolate can scorch easily if left unattended, which will affect the flavour and texture.
- Toast your nuts: For an extra depth of flavour, lightly toast the chopped nuts in a dry frying pan over a medium heat for a few minutes until fragrant. Allow them to cool before adding to the dry ingredients.
- Press firmly: Do not be shy when pressing the mixture into the pan. A firmly packed base will prevent the bars from crumbling when you cut them.
- Adjust the sweetness: If you prefer a less sweet bar, use dark chocolate chips and reduce the amount of honey or maple syrup slightly. Conversely, for a sweeter treat, add an extra drizzle of melted chocolate on top.
Storage and Make-Ahead
Store your Chocolate Crunch Bars in an airtight container in the refrigerator for up to one week. For longer storage, they can be frozen—simply separate layers with parchment paper to prevent them from sticking together, and they will keep for up to three months. These bars are excellent for meal prep; you can make them on a weekend and have a delicious, ready-to-eat snack for the week ahead.
Variations
- Vegan version: Use dairy-free dark chocolate chips and replace the honey with maple syrup to make these bars entirely plant-based.
- Flavour twists: Add a teaspoon of vanilla extract or a pinch of sea salt to the melted chocolate mixture for a more complex flavour. A sprinkle of cinnamon or nutmeg can also add a warm, spicy note.
- Add-ins: For extra texture and sweetness, fold in a handful of dried fruit such as raisins, cranberries, or chopped dried apricots along with the dry ingredients.
Final Thoughts
These Chocolate Crunch Bars are a wonderful example of how a few simple ingredients can come together to create something truly special. They are quick to make, require no baking, and are endlessly adaptable to suit your taste. Whether you are making them for a party, a bake sale, or simply as a treat for yourself, these bars are sure to bring a smile to anyone’s face. Enjoy the delightful crunch and rich chocolate flavour in every bite!